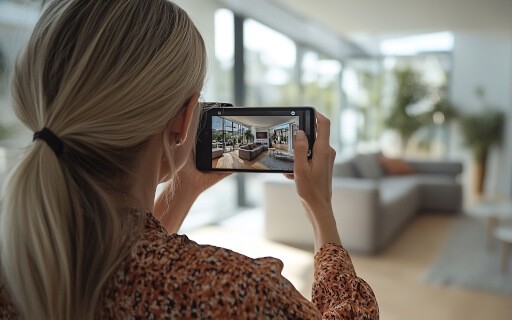
First impressions are everything, especially when renters are searching for their new home online. Excellent property photos will not only make your listing stand out, but also help you attract more tenants to rent out units. If you’ve never shot photos for a rental property before, here are a few tips and tricks that can help make your listing photos look more professional and stand out.
Lighting Is Key
Light can dramatically impact the feel of a photo. While photographing your rental property, it’s always a great choice to embrace natural light. Natural light is simply light from the sun. It can help an interior space look bright, natural, and inviting. Stand with your back towards a window so the light illuminates the room or subject you are photographing. However, keep in mind that too much sunlight can lead to an overblown shot that washes out your photo. You can also use blinds and curtains to shape light to get the best shot.
Although it is possible, try to avoid mixing natural and artificial light (indoor lamps, lighting fixtures, etc.). Having lights on while taking photos is a personal preference, but many interior photographers vouch for flipping the light switch off if possible. Interior lighting can create shadows that can be distracting to the eye. Sometimes in darker areas like bathrooms and kitchens, you will have to turn on all of the lights instead of relying on natural light. According to Christiaan Cruz, an architectural photographer for Apartments.com, if you have a unique lighting fixture that you want to show off, simply photograph it separately, especially if you’re shooting on a smartphone.
“If [landlords] have a tall lobby or a clubroom — anything that’s higher than standard — it’s just not going to show up on the phone. You’re going to have to tilt it up and it’s going to get distorted and look weird. So, it would be better for lighting fixtures and sculptures to photograph it on its own and then photograph the room as best as you can, flat and straight on," Cruz said.
It might be tempting, but Cruz also recommends avoiding flash. “Keep the flash off. That’s probably going to reflect on things and make it look too fake,” Cruz said.
Watch Your Reflection
Similar to shadows, if a person is present in a reflection, it can be very distracting. “When you are shooting that bathroom, make sure you’re not showing up in the reflection of the mirror. If you have to, open the medicine cabinet or move it a little bit so it doesn’t reflect back at you. Even in windows you can see yourself so just be aware of yourself appearing in photos,” Cruz said.
Showcase Highlights Within the Community
If the rental is located within a trendy neighborhood or you offer luxury amenities, highlight them in your property photos. Many landlords post pictures of common areas like the leasing office, swimming pool, or courtyard, so consider photographing relevant destinations or attractions in your area. For example, Cruz explains that if your rental is in a downtown neighborhood or is a storefront property, it might help to have a photo to illustrate that. Other examples include capturing a popular local restaurant or park that is within walking distance. If you want to go the extra mile, you can use a drone to capture photos from a bird’s eye view. “If you know what you’re doing and how to do it safely, go ahead and use the drone,” Cruz said.
Interior Photos Are Vital
Of course, capturing the community is important, but interior photos play a much larger role for independent landlords. When you post your photos to Apartments.com, select interior shots for your primary photo. The primary photo is the first picture featured on a listing. According to CoStar research, primary photos with interior shots typically out-perform exterior primary photos. For example, it was found that listings that use a living room as the primary photo have a 110% higher click-through rate than listings with exterior shots as primary photos. Pictures of amenities also perform better statistically. Listings with a pool primary photo have a 20% higher click-through rate than listings with exterior primary photos. Essentially, make sure to photograph the kitchen, bedrooms, bathrooms, and living spaces. Photography any unique amenities as well. Many landlords forget to include photos of these areas, so be sure to cover all your bases and use interior shots for your primary photo.
Stage the Room
You want potential tenants to envision themselves living in your rental. Staging rooms with furniture, light fixtures, and décor can help tenants paint a picture of what it might be like to live in the space. For example, you can place a few books on the coffee table, or go all out and highlight a patio with outdoor seating and colorful flowers. For a super easy and quick staging solution, Cruz recommends adding towels and small plants and pots in the kitchen. He says that you can also move these items from the kitchen to the bathroom if you need to as well.
If you are unable to stage a unit, frame shots with countertops, closets, and other features so you don’t just end up with only walls in the photo. Make sure closets are closed when photographing a bedroom and take a lone shot of the closet so tenants can gauge the size. Also, be sure that your rental is completely clean and free of clutter to avoid distracting the eye.
Remember, the goal of staging is to help the renter imagine themselves living in your rental. You can also hire a staging company to achieve a picture-perfect space.
It’s All About Angles and Lines
Similar to photographing people, angles dramatically influence a shot. Avoid weird, angled distortions by shooting wide shots at waist-level or right above countertop height. Cruz notes that aiming the camera too high or too low can lead to converging lines or a distorted image. You want the photo to look flat, similar to how a picture looks in a picture frame. Take photos from multiple positions in the same room while also making a point to snap close-ups of unique features. As a rule of thumb, make the vertical lines of the wall parallel with the vertical lines seen on your viewfinder to avoid crooked shots. To achieve this, you can use the grid feature to guide you. The grid feature will place lines on your viewfinder you can use to make sure the frame is parallel. If you’re using a smartphone, you can turn on the grid in your settings. If you’re using a digital camera, refer to the camera manual to learn how to turn on the grid since this can vary slightly depending on the model.
Consider Using a Tripod
A tripod can help achieve clear, crisp, and consistent photos. You can simply use your hands and camera to take rental pictures, but it could lead to blurry images, depending on the circumstances. Sometimes you might get blurry photos if you’re shooting in a darker setting such as a bathroom or basement without a tripod. Cruz recommends to always use a tripod when shooting interiors with a digital camera. If you’re using a smartphone, brace your elbows against your torso and stand straight and firm. “If you’re loose with your body, just like when you are taking pictures of your friends, you usually stay loose with the phone. When you’re shooting a still subject, you want to be stiff, firm, and solid, you don’t want your arms free,” Cruz noted. Thankfully, there are many affordable tripods available online that you can attach to your digital camera or smartphone.
Consider Shooting Video
Video has become a major player in the world of marketing and it can help strengthen your rental listing as well. You don’t necessarily need an expensive DSLR camera to get quality video, either; you can definitely use your smartphone. Combined with crisp photos, a video tour can help your rental listing stand out.
Don’t Hesitate to Ask for Help
The Apartments.com Help Center is an excellent resource for independent owners. The Help Center illustrates some of the basics of photo editing and exporting, along with the correct resolution and format you need to use. This online resource can also show you how to shoot, edit, and upload videos to Apartments.com.


